Breadcrumbs
Breadcrumbs
iOS의 Notification Center 확장, 그리고 Memory Leak 피하기
이전 포스트 iOS에서 키보드에 동적인 스크롤뷰 만들기에서 키보드에 의해 앱의 컨텐츠가 가려지지 않도록 화면을 조절하는 방법에 대해 설명하였습니다. 키보드에 대한 notification을 받기 위해서 Notification Center를 이용했었는데, 이번에는 이 Notification Center에 Extension을 추가하여 이전 내용을 개선해 보도록 하겠습니다.
이번 포스트의 내용은 이곳과 이곳을 참조하였으며 좀더 잘 이해하기 위한 내용과 문제를 해결한 내용을 추가하였습니다.
Intro
// Register Keyboard notifications
NotificationCenter.default.addObserver(
    self,
    selector: #selector(keyboardWillShow),
    name: UIResponder.keyboardWillShowNotification,
    object: nil)
NotificationCenter.default.addObserver(
    self,
    selector: #selector(keyboardWillHide),
    name: UIResponder.keyboardWillHideNotification,
    object: nil)
이전 포스트에서, 위와 같이 addObserver 메서드를 이용하여 키보드 notification의 발생 시 특정 메서드를 호출하게 만들고,
@objc private func keyboardWillShow(_ notification: Notification) {
    guard let userInfo = notification.userInfo,
        let keyboardFrame = userInfo[UIResponder.keyboardFrameEndUserInfoKey] as? CGRect else {
            return
    }

    let contentInset = UIEdgeInsets(
        top: 0.0,
        left: 0.0,
        bottom: keyboardFrame.size.height,
        right: 0.0)
    scrollView.contentInset = contentInset
    scrollView.scrollIndicatorInsets = contentInset

    let firstResponder = UIResponder.currentFirstResponder

    if let textView = firstResponder as? UITextView {
        scrollView.scrollRectToVisible(textView.frame, animated: true)
    }
}
위와 같이 userInfo 딕셔너리에서 키 값을 이용해 키보드 사이즈를 알아내어 스크롤뷰의 인셋으로 주었습니다.
하지만 notification을 처리하는 메서드에서는 userInfo 딕셔너리의 값 중 단 하나만 필요하고, 나머지 값들은 불필요합니다. 필요한 값을 꺼내기 위한 옵셔널 바인딩 과정도 번거롭고 긴 이름의 키를 써야 하는 부분도 깔끔해 보이지 않습니다. 게다가 notification을 등록하는 부분과 처리하는 부분이 떨어져서 위치하게 되어 코드의 흐름을 이해하는 데 좋지 않습니다.
이런 이유로 notification의 등록 시에 클로저로 notification 처리 기능을 전달하고, 클로저 안에서는 필요한 값만 이용하여 처리할 수 있도록 개선하려 합니다.
NotificationDescriptor, KeyboardPayload 만들기
먼저 NotificationDescriptor struct를 만듭니다.
struct NotificationDescriptor<T> {
    let name: Notification.Name
    let convert: (Notification) -> T
}
name은 등록할 notification의 이름을 저장하고, convert는 notification의 userInfo 딕셔너리에서 필요한 값을 파싱하여 반환하는 클로저를 참조합니다. 딕셔너리에서 꺼낸 값이 어떤 타입인지 모르므로 제네릭으로 선언합니다.
extension NotificationCenter {
    func addObserver<T>(
        with descriptor: NotificationDescriptor<T>,
        using block: @escaping (T) -> ()) {
        addObserver(forName: descriptor.name, object: nil, queue: nil) { (note) in
            block(descriptor.convert(note))
        }
    }
}
NotificationDescriptor의 name과 convert를 이용하여 기존 Notification Center의 addObserver(forName:object:queue:using:) 메서드를 호출하는 extension을 만듭니다.
등록한 notification이 발생하면, block(descriptor.convert(note)) 부분이 실행되게 되는데, 이때 NotificationDescriptor의 클로저(convert)를 동작시켜 notification으로부터 필요한 값만 꺼내고 block에게 전달합니다. block에서는 notification을 처리하는 작업을 합니다.
struct KeyboardPayload {
    let beginFrame: CGRect
    let endFrame: CGRect
}

extension KeyboardPayload {
    init(note: Notification) {
        let userInfo = note.userInfo
        beginFrame = userInfo?[UIResponder.keyboardFrameBeginUserInfoKey] as! CGRect
        endFrame = userInfo?[UIResponder.keyboardFrameEndUserInfoKey] as! CGRect
    }
}
KeyboardPayload는 notification의 userInfo 딕셔너리에서 키를 이용해 꺼낸 값을 저장하는 역할을 합니다. KeyboardPayload의 이니셜라이저는 NotificationDescriptor의 convert에 할당될 것이고, notification이 발생했을 때 userInfo 딕셔너리에서 필요한 값을 파싱하여 KeyboardPayload 인스턴스를 만들고 반환하는 역할을 합니다.
Payload란? 메시지 프로토콜 중 오버헤드와 원하는 데이터를 구분할 때 사용합니다. 어떤 웹 서비스 응답이 있을 때, 프로토콜 오버헤드(그 데이터와 함께 전송되는 헤더와 메타데이터와 같은 데이터 등)를 제외한 실제 클라이언트가 관심을 가지는 항목을 페이로드라 합니다. - 위키피디아
이곳에서는 user information 딕셔너리의 내용을 파싱하여 실제 로직에서 필요한 데이터(키보드의 사이즈 등)를 페이로드라 합니다.
다음은 NotificationDescriptor 인스턴스를 생성하도록 하겠습니다.
extension UIViewController {
    static let keyboardWillShow = NotificationDescriptor(
        name: UIResponder.keyboardWillShowNotification,
        convert: KeyboardPayload.init)
    static let keyboardWillHide = NotificationDescriptor(
        name: UIResponder.keyboardWillHideNotification,
        convert: KeyboardPayload.init)
}
NotificationDescriptor 인스턴스는 등록할 notification마다 하나씩 만들어야 합니다. 여기서는 키보드가 보여지고 사라지는 notification을 등록해야 하므로 두 개의 인스턴스를 생성합니다. 또한 위에서 작성한 NotificationCenter extension의 addObserver 메서드를 이용하여 키보드 notification을 처리할 클로저를 넘겨주는 부분은 ViewController에 있어야 하므로 UIViewController extension의 타입 프로퍼티로 할당합니다.
사용하기
이제 ViewController에서 사용해 보도록 하겠습니다.
override func viewDidLoad() {
    // ...
    registerKeyboardNotifications()
    // ...
}

private func registerKeyboardNotifications() {
    let center = NotificationCenter.default

    center.addObserver(with: UIViewController.keyboardWillShow) { (payload) in
        let contentInset = UIEdgeInsets(
            top: 0.0,
            left: 0.0,
            bottom: payload.endFrame.height,
            right: 0.0)
        self.scrollView.contentInset = contentInset
        self.scrollView.scrollIndicatorInsets = contentInset

        let firstResponder = UIResponder.currentFirstResponder

        if let textView = firstResponder as? UITextView {
            self.scrollView.scrollRectToVisible(textView.frame, animated: true)
        }
    }

    center.addObserver(with: UIViewController.keyboardWillHide) { _ in
        let contentInset = UIEdgeInsets.zero
        self.scrollView.contentInset = contentInset
        self.scrollView.scrollIndicatorInsets = contentInset
    }
}
이전의 notification handler에서 처리하던 내용에서, userInfo 딕셔너리에서 일부 값을 꺼내오는 부분이 필요 없어졌습니다. 원하는 값만 클로저의 파라미터 payload를 통해 전달되며, 이 파라미터는 KeyboardPayload타입입니다. 이 값에서 키보드의 사이즈를 알아내어 스크롤뷰의 인셋을 조정하면 됩니다. 저는 이 부분을 함수로 만들어 viewDidLoad에서 호출되도록 하였습니다.
자동으로 removeObserver 호출되도록 만들기
하지만 addObserver(forName:object:queue:using:)에 대한 애플 문서를 보면, removeObserver(_:)를 호출하여 observation을 등록 해제해야 한다고 되어 있습니다. addOberver를 호출하는 부분인 view controller의 deinit에서 removeObserver를 호출하는 것이 일반적입니다. 하지만 이렇게 사람이 수동으로 등록과 해제를 반복할 경우 놓치는 경우가 생기기 쉽습니다.
addOberver를 호출하고 notification을 처리하는 곳인 ViewController가 메모리에서 해제될 때 자동으로 removeObserver가 호출되도록 만들어 보겠습니다.
먼저 NotificationToken 클래스를 하나 만듭니다.
final class NotificationToken {
    let token: NSObjectProtocol
    let center: NotificationCenter

    init(token: NSObjectProtocol, center: NotificationCenter) {
        self.token = token
        self.center = center
    }

    deinit {
        center.removeObserver(token)
    }
}
NotificationCenter의 addObserver(forName:object:queue:using:) 메서드는 NSObjectProtocol을 준수하는 객체를 반환합니다. 이 객체를 위 NotificationToken 클래스의 인스턴스에 저장해 놨다가, 인스턴스가 해제될 때 자동으로 removeObserver 메서드를 통해 그 객체를 전달하도록 하였습니다.
이 NotificationToken 클래스의 인스턴스를 아래처럼 ViewController의 private 변수로 선언해 놓으면 ViewController가 메모리에서 해제될 때 notificationTokens도 레퍼런스 카운트가 0이 되어 자동으로 메모리에서 해제되게 됩니다.
private var notificationTokens = [NotificationToken]()
이전에 언급한 대로 필요한 notification이 2가지이므로 배열로 선언하였습니다.
다음으로 NotificationCenter 익스텐션을 수정합니다.
extension NotificationCenter {
    func addObserver<T>(
        with descriptor: NotificationDescriptor<T>,
        using block: @escaping (T) -> ()) -> NotificationToken {
        let token = addObserver(forName: descriptor.name, object: nil, queue: nil) { (note) in
            block(descriptor.convert(note))
        }
        return NotificationToken(token: token, center: self)
    }
}
addObserver 메서드를 호출하면 NotificationToken의 인스턴스를 생성하여 반환하도록 만들었습니다. 이 인스턴스를 ViewController에 선언한 notificationTokens에 저장해 놓으면 됩니다.
private func registerKeyboardNotifications() {
    let center = NotificationCenter.default

    let showToken = center.addObserver(with: UIViewController.keyboardWillShow) { (payload) in
        let contentInset = UIEdgeInsets(
            top: 0.0,
            left: 0.0,
            bottom: payload.endFrame.height,
            right: 0.0)
        self.scrollView.contentInset = contentInset
        self.scrollView.scrollIndicatorInsets = contentInset

        let firstResponder = UIResponder.currentFirstResponder

        if let textView = firstResponder as? UITextView {
            self.scrollView.scrollRectToVisible(textView.frame, animated: true)
        }
    }

    notificationTokens.append(showToken)

    let hideToken = center.addObserver(with: UIViewController.keyboardWillHide) { _ in
        let contentInset = UIEdgeInsets.zero
        self.scrollView.contentInset = contentInset
        self.scrollView.scrollIndicatorInsets = contentInset
    }

    notificationTokens.append(hideToken)
}
위에서 나왔던 registerKeyboardNotifications 메서드를 수정하여, 반환된 인스턴스를 notificationTokens에 append하도록 만들었습니다.
이제 ViewController가 메모리에서 해제될 때, removeObserver가 호출되는지 확인해 보도록 하겠습니다.
removeObserver 호출되는지 확인하기
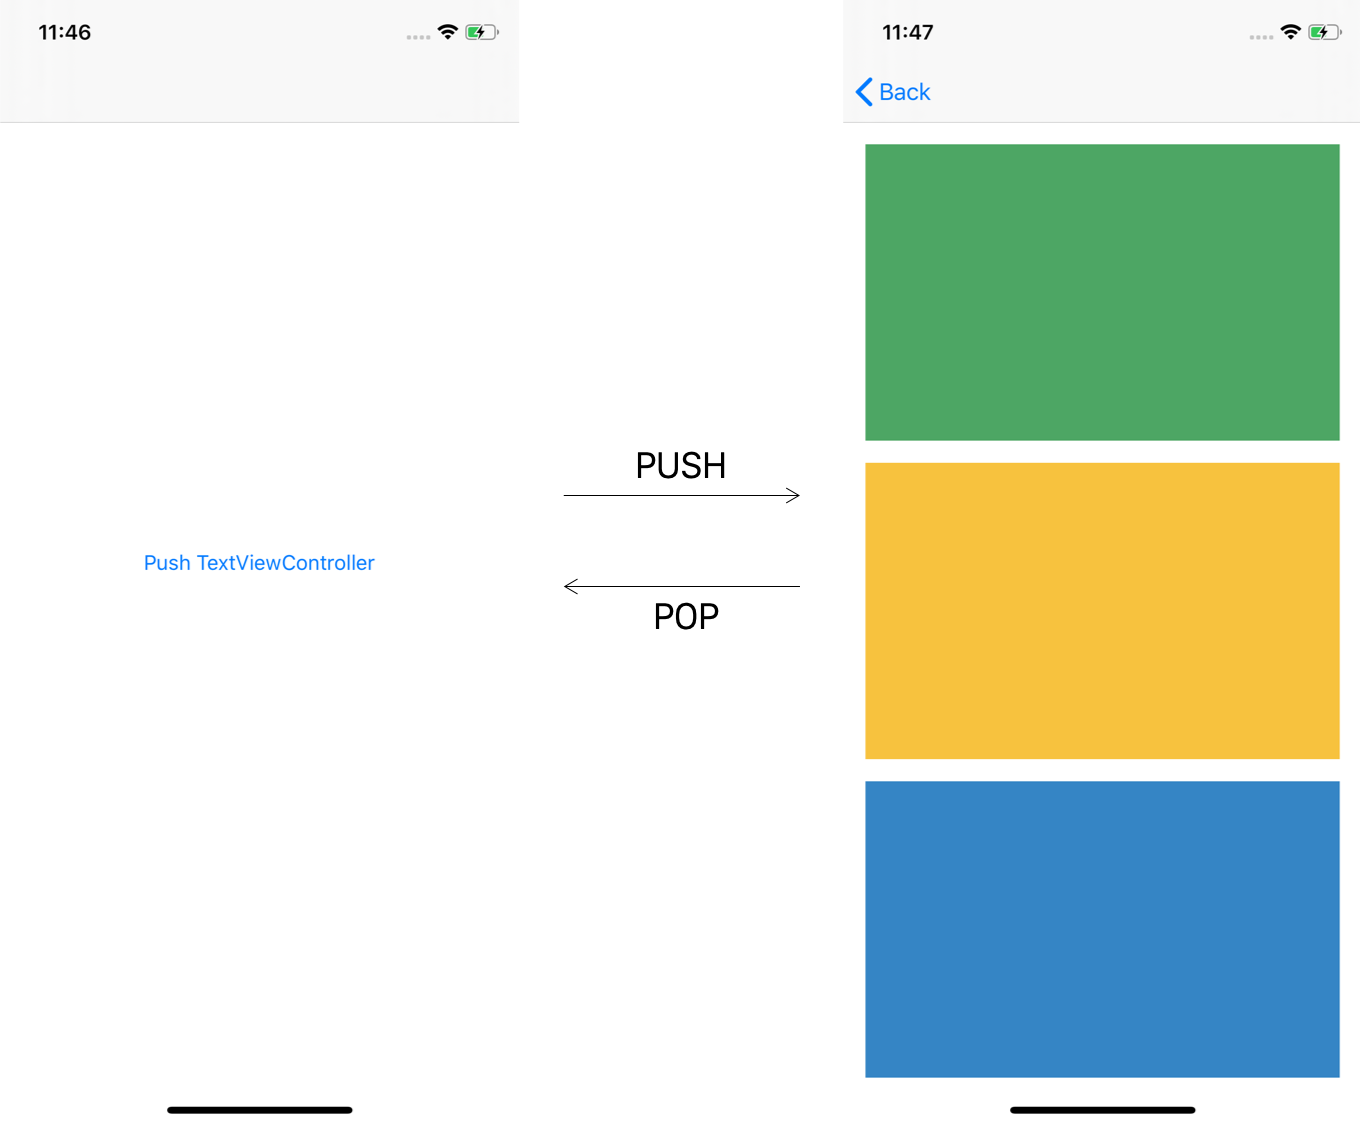
먼저 기존 ViewController를 좀더 구체화시키기 위해 TextViewController로 이름을 변경하겠습니다. 그다음 RootViewController를 새로 만들고, 이 RootViewController를 네비게이션 컨트롤러에 임베드 한 후, TextViewController(기존 ViewController)를 그 위에 push하도록 만들었습니다. RootViewController의 버튼을 누르면 TextViewController가 네비게이션 스택에 push됩니다. TextViewController에서 back 버튼을 누르면 TextViewController가 네비게이션 스택에서 pop되고, 메모리에서 해제될 것입니다.
TextViewController가 메모리에서 해제되는지를 확인하기 위해 deinit 메서드를 작성합니다.
class TextViewController: UIViewController {
    // ...
    deinit {
        print("TextViewController Deinitialized")
    }
}
그리고 removeObserver가 호출되는지 확인하기 위해 NotificationToken의 deinit에도 print문을 추가합니다.
final class NotificationToken {
    // ...
    deinit {
        center.removeObserver(token)
        print("Observer Removed")
    }
}
하지만 현재는 코드에 문제가 있기 때문에 호출되지 않습니다.
Memory Leak 피하기
addObserver를 호출하는 부분을 잘 들여다 보면, 클로저 안에 self 키워드가 존재합니다.
let showToken = center.addObserver(with: UIViewController.keyboardWillShow) { (payload) in
    let contentInset = UIEdgeInsets(
        top: 0.0,
        left: 0.0,
        bottom: payload.endFrame.height,
        right: 0.0)
    self.scrollView.contentInset = contentInset
    self.scrollView.scrollIndicatorInsets = contentInset

    let firstResponder = UIResponder.currentFirstResponder

    if let textView = firstResponder as? UITextView {
        self.scrollView.scrollRectToVisible(textView.frame, animated: true)
    }
}
위 코드에서 NotificationCenter는 등록된 클로저를 참조하고 있다가 노티피케이션이 오면 실행시켜주는 싱글톤 객체입니다. 클로저를 등록할 때 self 키워드로 View Controller 인스턴스를 참조한다면, NotificationCenter 측에서는 등록된 클로저를 참조하고, 클로저는 View Controller 인스턴스를 참조하는 관계가 됩니다.
이 때 NotificationCenter는 싱글톤이라서 메모리에서 해제되지 않기 때문에, NotificationCenter에 등록된 클로저가 캡쳐한 View Controller 인스턴스 또한 네비게이션 컨트롤러에서 pop 되어도 레퍼런스 카운트가 0이 되지 않아서 메모리에서 해제되지 않게 됩니다. 이 때문에 메모리 릭이 발생합니다.
ViewController 인스턴스가 메모리에서 해제되지 않으면, notificationTokens도 해제 되지 않습니다. 당연히 removeObserver도 호출되지 않습니다.
참조는 가능하지만 레퍼런스 카운트가 증가하지 않는 weak 레퍼런스를 이용해서 이를 해결해야 합니다.
private func registerKeyboardNotifications() {
    let center = NotificationCenter.default

    let showToken = center.addObserver(with: UIViewController.keyboardWillShow) { [weak self] (payload) in
        guard let strongSelf = self else { return }

        let contentInset = UIEdgeInsets(
            top: 0.0,
            left: 0.0,
            bottom: payload.endFrame.height,
            right: 0.0)
        strongSelf.scrollView.contentInset = contentInset
        strongSelf.scrollView.scrollIndicatorInsets = contentInset

        let firstResponder = UIResponder.currentFirstResponder

        if let textView = firstResponder as? UITextView {
            strongSelf.scrollView.scrollRectToVisible(textView.frame, animated: true)
        }
    }

    notificationTokens.append(showToken)

    let hideToken = center.addObserver(with: UIViewController.keyboardWillHide) { [weak self] _ in
        guard let strongSelf = self else { return }

        let contentInset = UIEdgeInsets.zero
        strongSelf.scrollView.contentInset = contentInset
        strongSelf.scrollView.scrollIndicatorInsets = contentInset
    }

    notificationTokens.append(hideToken)
}
클로저에서는 self를 weak로 캡쳐합니다. weak 레퍼런스를 이용하면 레퍼런스 카운트가 증가하지 않기 때문에 ViewController 인스턴스가 메모리에서 해제될 수 있게 됩니다.
weak 레퍼런스의 경우 클로저가 실제 동작할 시점에 참조하고 있는 객체가 이미 메모리에서 해제되었을 수 있기 때문에 nil일 수도 있습니다. 옵셔널 바인딩을 이용해 언래핑 후 기존 기능을 수행합니다.
그럼 이제 네비게이션 컨트롤러에서 TextViewController를 pop할 때, deinit과 removeObserver가 호출되는지 확인해 보겠습니다.
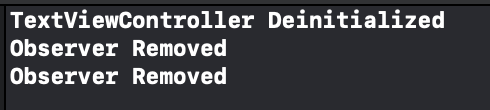
TextViewController의 deinit과 두 번의 removeObserver가 호출되는 것을 확인할 수 있습니다.
마무리
이렇게 Notification Descriptor를 이용하여 유지보수가 쉬운 코드로 개선하는 방법과 메모리 릭 방지 방법 설명, deinitializer 및 removeObserver 메서드 호출 확인까지 차례로 해보았습니다.
이 방법을 이용하여, 다른 시스템 notification이 필요해진다면 그에 대한 playlaod 구조체를 만들어 활용할 수 있습니다. 이 때 NotificationDescriptor와 NotificationCenter extension 코드, NotificationToken 등의 코드는 수정하지 않고 재사용할 수 있습니다.
전체 소스 코드는 이곳의 DynamicScrollWithNotificationDescriptor 프로젝트에서 확인하실 수 있습니다.